Friday, September 28, 2012

It's not September 30th!

Look, it's not the last day of September!  And I've got my September challenge done.  This is in large part due to my daughter (a fellow quilter!) who reminded me that this was the last week of September.  I thought I had another week to play with this.  Okay, so I admit it, I am a procrastinator... queen of the last minute "oh no, it needs to be done when?!!"

I've been a bit distracted because I am so looking forward to going on  an annual "quilt trip" with the York Towne Quilt Guild to the Lancaster, PA area.  Four quilt shops, one dinner theater, and stops at the Wilbur Chocolate Factory and/or Sturgis Pretzels.  We'll have fun on the bus and get to peruse beautiful fabric and patterns to our heart's content.  What could be better!

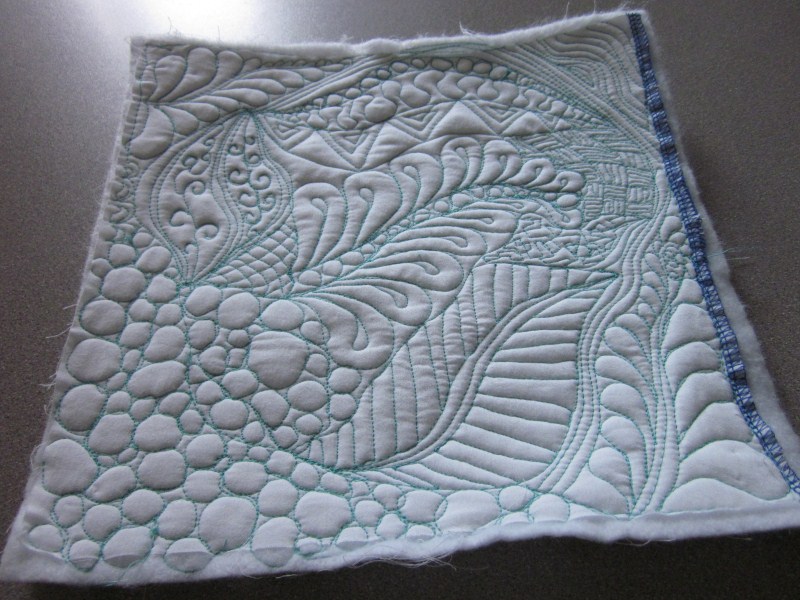
For the September Free Motion Quilting Challenge SewCalGal brought us a feathered circle tutorial from Paula Reid.  It required transferring the pattern to my fabric and then quilting on the line.  The pattern came from The Pattern Company.  I'd rather quilt without a pattern, it's much easier than following a line (mistakes don't show as much), but I gave it a shot.  
I was going to do this on a piece of beautiful blue silky fabric leftover from my daughter's prom dress, tracing the pattern using Don Linn's tulle technique.  Unfortunately, I've misplaced my tulle, so I pulled out some plain white fabric that I could see through well enough to trace the pattern with my trusty disappearing blue marker.

Amazing how well a new marker works.  No more struggling with the nearly dried out one.


Must be I've been improving, because it was much easier than I thought it would be.  I did some close stippling around the circle to make it really pop.  My piece turned out quite nice if I say so myself!  I'll find my tulle after I get back from my quilt trip and try this again.  I really like the pattern and can see me using it in some future quilt.


A few spritzes with some water, and voila!
That's all for now.  I'm off on a road trip tomorrow, yipee!

Happy quilting,

Kathy

Friday, August 31, 2012

August Challenge - Jester Hats or Tilt-a-Whirls

 SewCalGal's challenge this month came from Wendy Sheppard.  It's an all-over pattern she calls "jester hats."  It looks deceptively simple, but gave quite a few of us a challenge.

My finished jester hats
I didn't have much time to quilt this month - my daughter, Lisa, and I have been working on the interior of our "porch," with help from her fiance.  It's really a three-season room now.  The project has been in the works for over five years and we finally got to the drywalling stage.  So all month long I've been coming home from work, changing into my grungy clothes and slapping "mud" (aka drywall compound) on the joints and screw holes.  Okay, "slapping" is not the right word.  I'm too much of a perfectionist.  A professional would have had it done in only a day or two, but it took me a good deal longer, and boy are my neck and shoulders sore!

Then, when I did get a chance to quilt the temperature was in the 90's.  TOO HOT in my sewing room!  I had been drawing page after page of jester hats, and like many of the quilters in the challenge, was having a problem with them.  They just didn't look the same as Wendy Sheppard's!  The spacing was off, I only seemed to be going in one direction (diagonally) and I kept getting trapped.

This is my fourth or fifth attempt at drawing.
 
I finally printed out one of the pictures and traced that several times. Then I went back to my paper, and low and behold I got it!  Several folks mentioned that when they thought of the pattern as a dance it helped.  Well, I'm not a dancer, so that didn't help me!  But it started feeling more natural when I started thinking of a tilt-a-whirl - you know, that carnival/fair ride?  You twirl and twist as you're going around in a circle and then, whoops! You're going the opposite direction.  My mantra (which helped me loads!) was "bump, bump, BIG curl, bump, bump, BIG curl..."

They're finally getting more even!

Since I haven't been piecing much this summer, what with the porch and the heat and all, I didn't have a project that needed quilting.  So, I used a scrap piece of muslin and some pieced together batting that I had laying around.  It's nothing special, but my challenge is done!  I'll definitely put this pattern in my repertoire.  It's a great, fun looking pattern for large spaces.

I did finally admit to myself that I can't use the cheap thread on top though.  I struggled through lots of breaking threads (pink, teal, blue, dark purple and light purple) and just crummy looking stitches before I broke down and used my good stuff.  I really want to use up the junk stuff for my practice, but it's not worth the headache!  It did seem like it worked okay in the bobbin, so maybe I can get rid of it there.

Same piece but different lighting to show the texture better.


The other thing I learned was that I tend to move my fabric too quickly around the big curves.  This gave me great practice in getting my hand and foot/machine speed to match up!

Here's Lisa applying the first coat of mud.  The mudding is done and Lisa put a primer coat on before she headed back to college last week.  I really, really appreciate her help.  We've chosen a soft peach color for the porch, and she's planning on painting it on her first long weekend.  I hope the weather cooperates!

Lisa applying the first coat of mud.

Good thing the ceiling isn't any higher!
Happy Quilting!

Kathy

Tuesday, July 31, 2012

July's FMQ Challenge - Tiles!

Despite my best intentions, I did not get to practice much on my FMQ this month.  It has turned out to be one of the hottest summers in Western New York on record!  And, unfortunately, my sewing room is upstairs on the west side of the house with no air conditioning (we really don't usually need it here!).  So, I've only had a few days to practice and get my challenge piece done this month. 

But what a challenge!  Our challenger/teacher this month was Angela Walters, a phenomenal long-arm quilter.  She showed us how to break a large area up into "tiles," squares that looked like they were overlapping. 

Here's my piece, quilted on muslin with a cotton/polyester batting scrap pieced together for the innards.  I used some old serger thread in the bobbin (I've got to use it up, and it didn't give me any problems!), and some Coats and Clark Tri-lobal polyester for the top thread in a contrasting greyish/silver color.  The label came off the spool so I'm not 100% sure what it is, but it looks good!

Tiles!
I apologize for the fuzziness of the picture.  I had a lot of fun with this challenge.  It was a great way to try out several of the Leah Day FMQ Project designs that I had my eye on (angles and circles, beaded curtain, beaded lace, flower ball, flower skeleton, icicle lights, striated earth, sunshine, swirl, wiggly tentacles), in addition to a couple of the past challenges (January's leaves, February's feathers, and May's railroad tracks, ) 

I did mark the tiles with a water soluble blue marker.  I know myself well enough to know that I can't sew a straight line unless I have something to follow!  I also marked the center of the flower on the lower right, and the diagonal lines of my leafy vines on the left.  Apparently I can't follow straight lines even when I draw them in, as my leafy vines went a little off-kilter.  I think there was a breeze or something that came through!

I decided to cut the piece into quarters and make them into placemats for my church's annual holiday bazaar (first Saturday in December at the Geneseo United Methodist Church, Geneseo, NY).  I had left-over gray silky fabric from last month's project that I though would match the top thread perfectly.  It had some water/age stains on it so I thought I'd try hand washing it and making it a bit crinkly.  Especially since I know if the placemats are washed the silky fabric will end up crinkly anyways.

Placemats (still need binding)

I started sewing the binding on using the integrated walking foot, I think it's called the Acu-Feed system, on my new Janome 6600. Rats! I started sewing it from the wrong side.  I only had a couple of inches sewn, so it wasn't much of a problem to take it out and start over.  I only sewed the binding on one mat as I wanted to get at least one done so I could show all of my adoring fans (all eight of you!), how it turned out.

Finished!  The picture just doesn't do it justice.
Anyways... I started hand sewing the binding down and discovered, I had sewn it on the back side to be folded over to the front.  I must have had a giant mental blip when I was machine sewing the binding, because I had it right the first time!  Oh well, I wasn't about to take it all out now.  That silky fabric frays way to much.  So, I'll have a Sesame Street set of placemats..."Three of these things belong together... One of them just isn't the same!"  I'll sew the other three correctly, assuming I put my brain in gear before operating the sewing machine.

That's all for now.  Happy quilting!  And if you don't quilt... happy oohing and aahing over your loved one's projects!

Kathy

Friday, June 29, 2012

June's FMQ Challenge Piece

I was so excited to see Cindy Needham's challenge on SewCalGal's Free Motion Quilting Challenge. This "divide and conquer" design is part of what started my FMQ internet search 9 months ago.  I have been absolutely blown away by the support, growth and talent shown on the associated Facebook page. 

Some of these folks have been quilting on satin-type fabric.  Those pieces have looked phenomenal, but I figured that the slippery fabric would be too hard to work with.  But when I came across a large piece that had been water stained and was good for nothing else, I thought, "What the heck, why not?"

So, without further ado, here is my piece for the June Challenge.


I am absolutely thrilled with how this turned out.  Not only was the silky fabric easy to work with, but it hid a multitude of mistakes - places where I had wandered when I traveled, not quite round circles, and just plain "oopses."  

As I said, Cindy's challenge was perfect for me. I have doodled these designs my whole life.  In fact, within the last year I had done this one:


Now I find out that someone has labeled my type of doodling "Zentangles."  Who knew?  If I had just thought to publish my doodles I could be rich and famous!  I had shown a couple of my friends this particular one, and both of their reactions were, "You should quilt that!"  Riiggght...Sure... I'll get right on it. NOT!!  At the time I couldn't see any way, short of working with an overhead projector and tracing the doodle onto a large piece of fabric, to quilt this.

Enter Leah Day and her wonderful Free Motion Quilting Project with 365 designs and I had a glimmer of an idea.  Then this month Cindy shows up and voila!  I'm off and running.  I started with some more doodles, this time done in color.  My future son-in-law gave me some great pens for Christmas, I just had to use them!


And then I started on some practice sandwiches.  I wasn't very happy with the results.  I was using "normal" Coats & Clark sewing thread and found that it had a tendency to break when I sewed over the same line multiple times.  Since these were practice pieces I just trimmed the threads close, rethreaded, and kept on going.

first practice piece

My second piece was on scrap fabric, which was quite busy.  You can see the design better on the back.  It's not filled up yet, so I will go back to it and practice some more.  I'm finally learning to move my hands slower.

second practice piece - front

second practice piece - back

Here's some more close ups of my silky satin piece.  And one with a pen in it for scale.  I used some tri-lobal polyester on it in a matching gray. I think it was 40 wt, but the label has come off of the bobbin.  I don't think the thread broke once!  I just keep "petting" it.  It looks and feels so neat!


Thank you so much, Cindy, for showing me the way!  I can't wait to get back to my new machine and do some more!

Happy Quilting, if you're a quilter.  If not... just ooh and ahh over your friend's quilting projects!

Kathy R.

A Six-Letter Word

This week marks the anniversary of my receiving the news that I had breast cancer.  Cancer is a six-letter word that has much more impact than any four letter word that I know.  Of course, when you hear that six-letter word applied to yourself or one of your loved ones, more often than not, several four-letter words ensue.

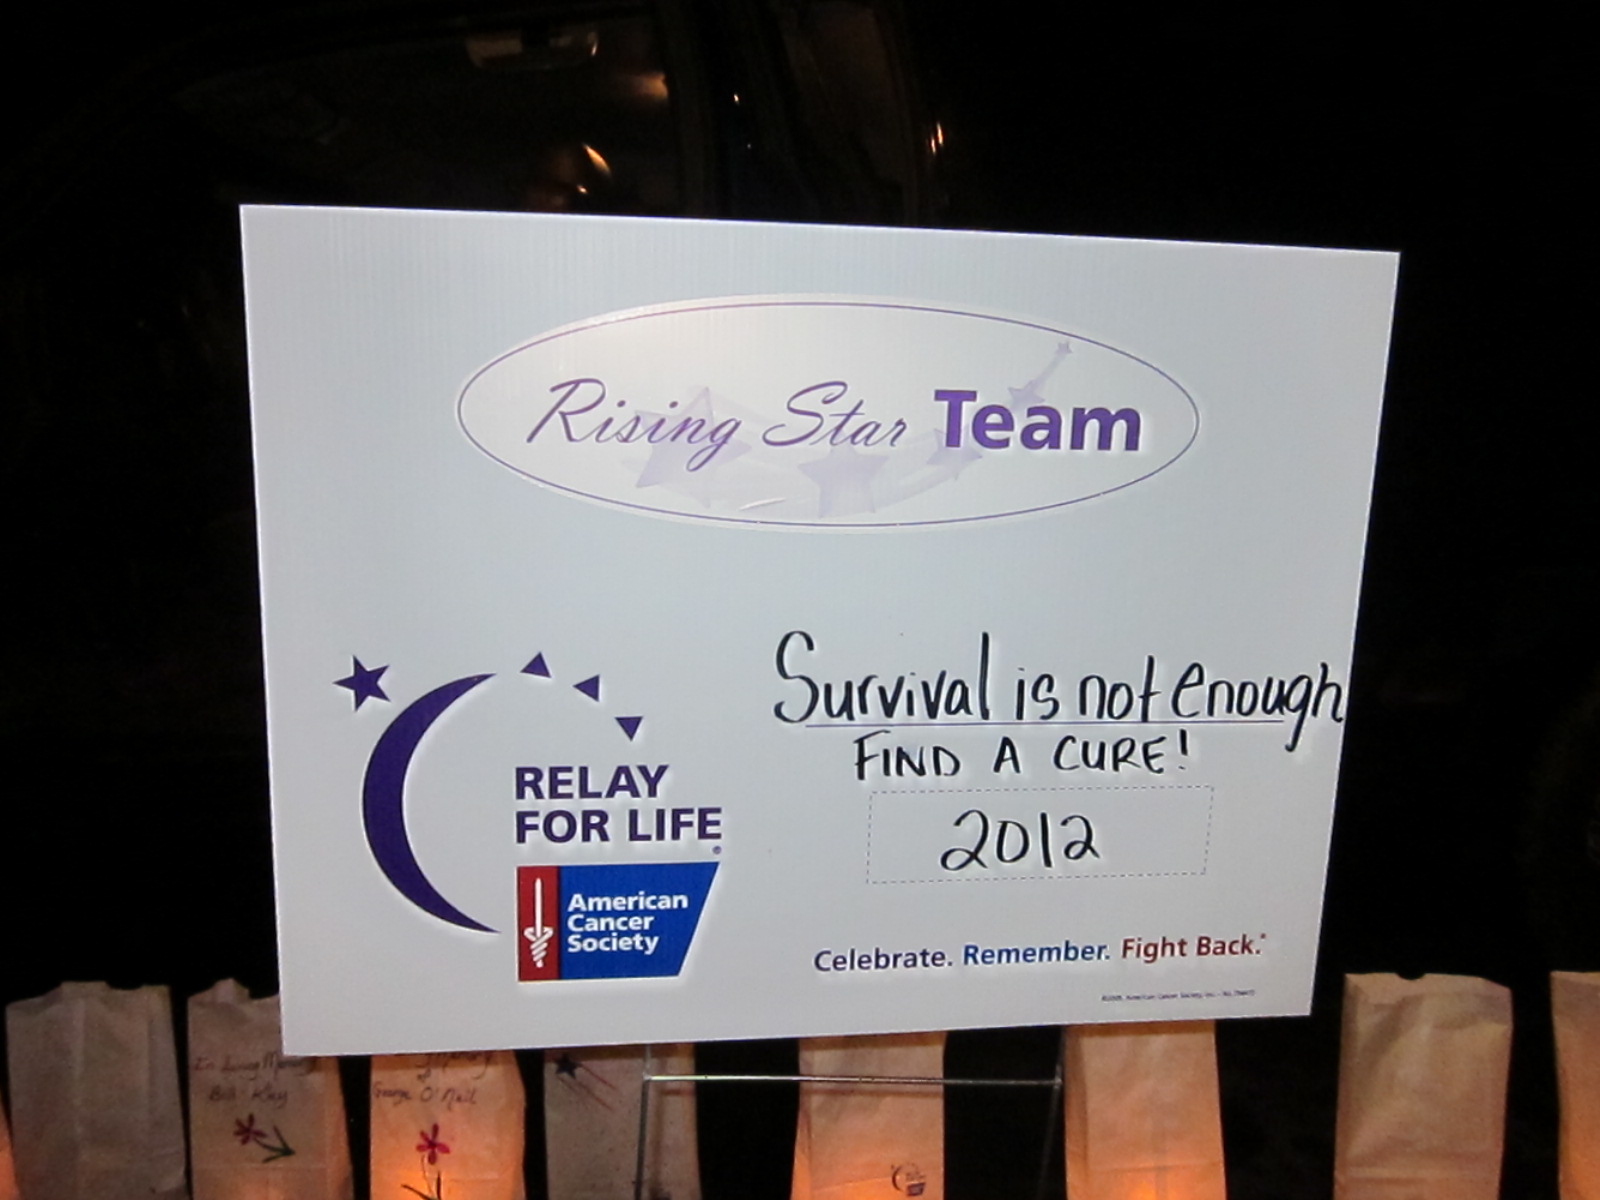
I am very happy to say that I have been cancer free for nearly two years (that anniversary is July 30th!).  But I wanted to share a special event that I recently took part in – The American Cancer Society’s “Relayfor Life.”  This fund-raising event is a “relay” event that lasts 12 hours, with someone walking at all times. ACS Relays are held in towns throughout the United States.  The ACS provides support 24/7 for people affected by cancer.  They also fund a great deal of research.  In the past two years not only myself, but two sisters-in-law, my father, and four friends were diagnosed with cancer.  My father passed away.  I walked in this relay in honor and in memory of them.

SIDEWALK ART


I am not a fundraiser.  I hate asking for money.  But thanks to family and friends that supported me financially, and those that joined me at the relay, our team, named “Survival is NOT Enough… Find a Cure!” raised more than $1,800.00!!  I was thrilled to have to keep raising my goal because we kept meeting it!  The “Relay” in Honeoye Falls, NY raised nearly $62,000.00. 


Our team "tent" with Matt, Chandra and Chris

The "Survival is NOT Enough" Team!
Front: Sue, Joan, Lisa, Chandra, Chris, Barb, Jo, Katie;
Back: Scott, Brandon, Matt, Kathy (Me), Bruce, Steve, Eric;
Missing: Kaitlyn and Tyler


My husband Bruce and daughter, Lisa, surprised me with team t-shirts.  I think they helped us win the “most team spirit” award.  That and my sister, Chris, and I played one of the games in which we were the only adults that took part – we kind of stood out as 50+ year old “youngsters” amongst the kids!  ;-)   


My sister-in-law, Sue, walked the “Survivor’s Lap” with me.  Quite an accomplishment considering that just a year ago her sacrum (the bone that connects the hip to the spine” was removed and she had reconstructive surgery.  My friend, Chandra, brought us chocolate-covered strawberries.  I think my son, Matt, had two strawberries for every lap he took!  Chandra kept track of the laps she walked and figures she walked about ten miles!! 

______________________________________________________________________________
LUMINARIAS
---------------------------------------------------------------------------------------------------------------

the luminarias in the staging area - this is only about half of them

At dusk we lit luminarias in honor of or in memory of family and friends, and then walked a candle-lit lap.  It was very moving.


Chris and Matt lighting a luminaria - what teamwork!
The reason we keep Matt around is because he can reach the top shelf (that and we love him)


only a few of the lined up luminarias
more luminarias


As I said in an email I sent to friends and family, I am sick of the slicing and dicing, the chemotherapy and radiation.  There has got to be a better way.  I think it is time to eliminate that six-letter word and find a new four-letter word… C U R E!!  Please consider supporting the American Cancer Society, either through support of a friend who is taking part in a “Relay for Life,” or by donating directly to the ACS.  If you wish to support the “Survival is NOT Enough” team directly, you can do so by visiting this website and entering either our team name or my name (Kathy Rosier) in the appropriate box on the right hand side.  If you’re not able to help financially (believe me, I’ve been in that boat!), support us with prayers, hugs, uplifting words, or even chocolate-covered strawberries.  It is all very much appreciated!


We all need hope.

Ladies, do your breast self-exams monthly and get your annual pap smear.  Don't be afraid to call your doctor and say "it's not exactly a lump, but it's different than normal."  The life you save may be your own! 

Okay, getting off my soapbox now and getting back to the regularly scheduled program.  :-)


PS Sorry about the weird picture layout. I keep trying to get more than one picture on a line (pictures side by side) but it messes everything up.  If anyone had suggestions I'll take them!

Thursday, June 28, 2012

Martin's Quilt

It's about time I get caught up here - like that's ever going to happen.  I never could write regularly.  Do you remember getting a diary for Christmas - the one with the tiny gold key?  I remember thinking, "I'll write every day!"  It never happened back then, I usually managed to get a week's worth of entries written before losing interest.  And I'm sure I'll continue to be lagging behind here too.

Anyways, I thought I'd post pictures of the baby quilt I made for my great-nephew, Martin. 

He's a real cutie! (I made the bib too).
I promised it to his parents at his baby shower in January 2011.  I managed to get it done for his first birthday this year in March!


I saw the pattern at my local quilt store, Mt. Pleasant Quilting, and thought I could figure it out myself.  It is, after all, just squares and rectangles.  I wish I had written down who designed so that I could give them credit!  I searched my stash for brightly colored juvenile prints (as opposed to pastels which the parents didn't want), and found some really fun ones.  Of course, I had to make a shopping trip because I didn't have enough variety (I can come up with any excuse).  The border fabric is all ants and the backing is cars and trucks - perfect for a little boy!

my husband said we need an exterminator


On some of the squares I used the "stack the deck" method of piecing.  It was really easy.  Stack 5 squares; cut them randomly; shift 1 piece, 2 pieces, 3 pieces, 4 pieces, from the top to the bottom of each stack; sew them back together; and trim.

I put my new found free motion quilting skills to good use and quilted loop-de-loops in all of the sashing.  I left the squares plain.


Martin seemed to really enjoy his quilt. He, and it disappeared later that evening.  His mom said he was cuddled up under the quilt, fast asleep, upstairs!

Martin and his Uncle Fred


I love it when my quilts are so appreciated.

Until next time,

Kathy


The Power...

So, my old sewing machine finally bit the dust.  It was a Singer that was nearly 30 years old and it had been a floor model before I bought it.  I made a t-shirt quilt and quilted it myself - my first foray into free motion quilting.  Then I pieced and quilted a baby/toddler quilt for my great-nephew.

She's a goner :-(

I finished that one, but when I went on to the next project - practicing for the Free Motion Quilting Challenge, the machine just wouldn't work.  It was making a horrible grinding noise and I couldn't get the tension set right.  I had just had it in for service to the tune of $100.  I don't think the machine is worth that much!

So I went shopping for a new machine and have purchased a beautiful, new Janome 6600 from Marie's Sewing Center in Lockport.  Linda, one of the sales girls there, let me play with one for more than an hour.  I took my own sample fabrics and sandwiches and tried a bunch of different stitches.  It took me another two weeks to decide to plunk down the money, but around Mother's Day, I brought my new baby home.

My new baby!

Now, true to form, I sat down next to my new machine with my 93 page instruction book, and went through everything, step by step.  I got all the way through the table of contents... the parts list... how to plug it in and turn it on... when I came upon page 7, and one of my most hoped for features - the automatic needle up/down button.  Of course I had to try it out so I pushed the button and heard a loud ka-thunk!

Oh no, what had I done?!!  I looked down to find that the needle had, very neatly and easily, penetrated 86 pages of the instruction book!  What power! The needle didn't even break!  I think this machine will have more than enough punch for whatever I'd like to do.

There's a needle hole right above the "i" in finishing...

...all the way through the back cover!

I did tell my husband that it was now impossible for me to return the machine (like I was going to do that!) because I had defaced the book ;-)

I've had the machine for a couple of months now and it is working beautifully.  I did purchase the blue arrow bobbin case for free motion quilting as I was having problems with shredding and breaking threads and I didn't want to mess with the bobbin tension all the time.  It has helped to clear up those problems and I would definitely recommend it.

Now, if the weather would just cool down so my sewing room isn't 100* I could go play.  

Until next time,
Kathy R.