Monday, April 30, 2012

The Tulle Tool

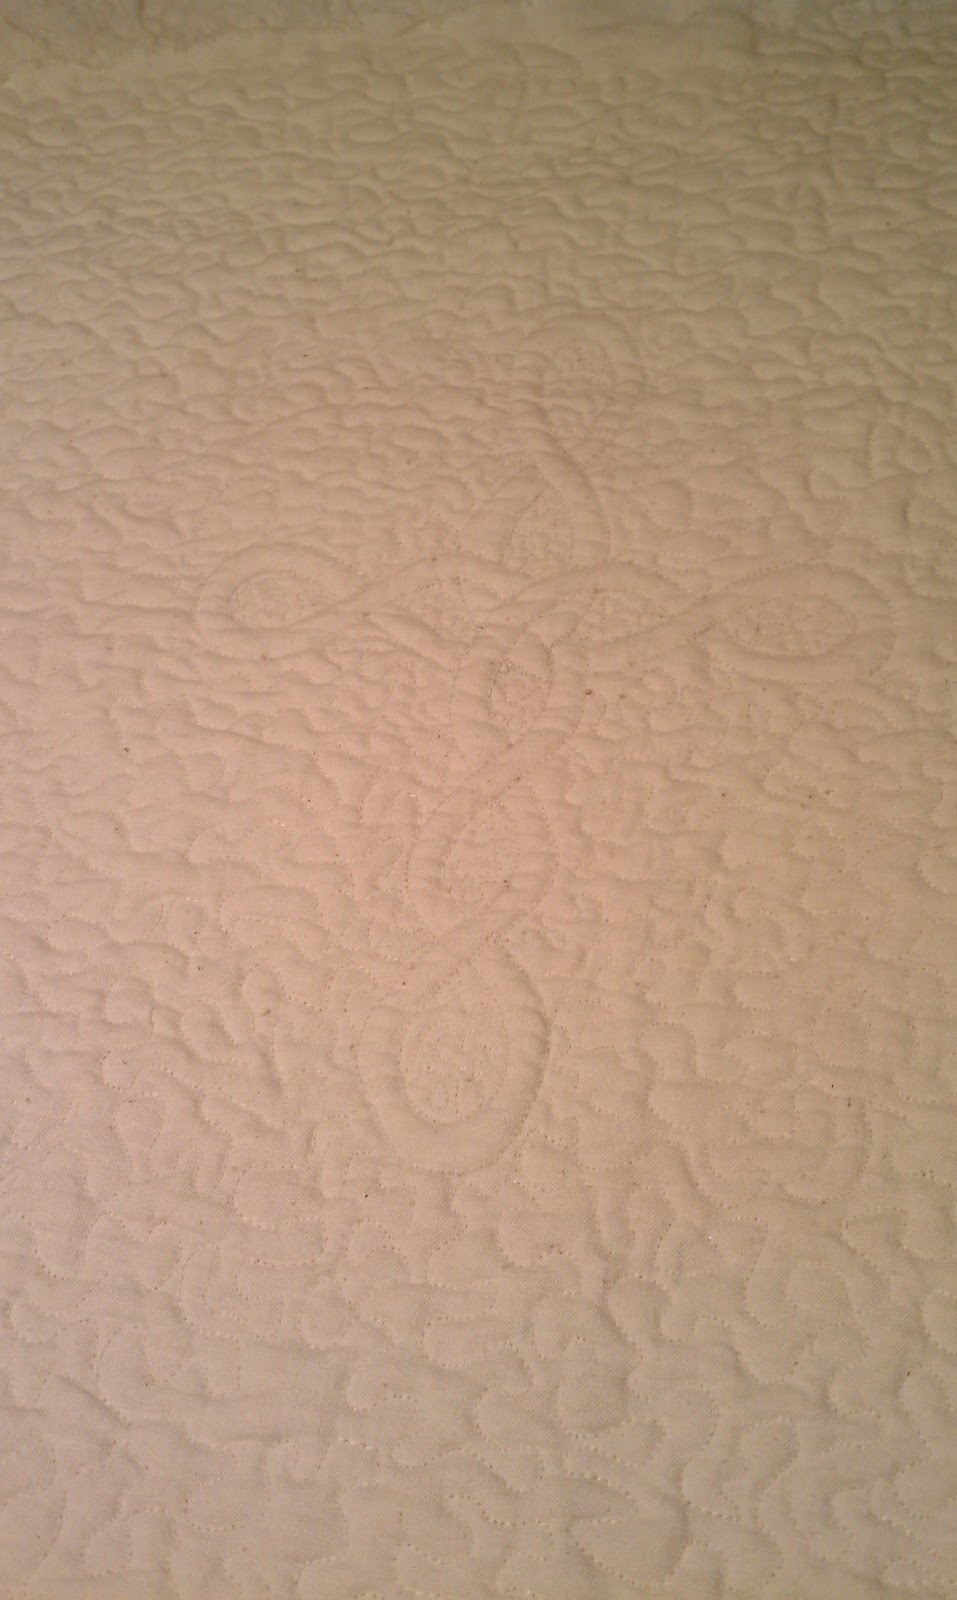
Whew!  I'm squeaking in just under the wire this month with my Celtic knot cross!  It turned out really neat.

Finished Celtic Knot Cross

Our guest "teacher" for the Free Motion Quilting Project for April was Don Linn.  He showed us a neat marking technique that uses tulle.  Basically, put a piece of tulle (fine netting) into an embroidery hoop, trace your pattern with a permanent marker, heat set it (so it doesn't smear all over your nice fabric!), and then use that as a pattern to trace onto your fabric, with a removable ink pen or chalk pencil.

My Tulle Pattern
Someone on the FMQ Challenge Facebook page suggested putting the tulle into a cardboard frame instead of the embroidery hoop.  I really liked this idea for a couple of reasons.  I didn't have to be so careful about not stretching the tulle out of shape, and it will store nice and flat.

Pattern traced onto my fabric

I really wish I had known about this before I marked the t-shirt quilt.  I think it would have been a bit more accurate than what I did. 

I didn't have a chance till the end of the month to work on the challenge because my sewing machine is still down and out.  I borrowed one from our sewing group.  What a difference compared to my old machine!  This one is no spring chicken either, but my old machine would break thread every ten minutes and I just couldn't keep the tension consistent.  This machine, an Elnita 250 by Elna, works so much better. 

The cross is qulted!
 
I quilted the cross, and then decided to stipple around it, hoping to make it stand out a bit more.  This is the first stippling I've done other than a bit of practice.   On the back side I used up an off-white bobbin.  It was a bit darker than what I used on the front.  The cross really stands out better.  Unfortunately, I ran out of that thread less than a quarter of the way through so I can't use the back for the front.

with the stippling, before I washed out the purple disappearing ink

I was all set to look for a new machine two weeks ago, but then our car got hit - took the bumper off the back and smushed the rear quarter panel - and needed some major repairs.  Luckily the insurance covers it, but we've got a rental car that only my husband can drive.  Which means, I can't go far unless I want to man-handle the gas-guzzling truck.  I'm so glad I've got the sewing group!  Hopefully by the end of next month I'll have a new machine.

Until then, 
Happy Quilting!

~ Kathy


Saturday, March 31, 2012

My March FMQ Challenge

Wow, I had a great quilting month!  I finished two quilts - a double-sized T-shirt quilt (that I've already posted about), and a "somewhere between crib and twin"-sized quilt for my great nephew (pictures coming soon!).

I didn't get much practice in on Ann Fahl's tutorial.  I thought I'd do some practice pieces this week, since I had finished the two projects that I had deadlines for. That didn't happen.

Luckily, on my quilts, I had used two of her suggested patterns.  One small square with stars.

stars and loops on the T-shirt quilt

And the entire twin quilt with loop-de-loops.

loop-de-loops on the crib/twin quilt

The reason I didn't get any practice pieces done this week is because my machine decided it wanted to make bird's nests instead.
    
bird's nests

I don't know why this is happening.  The machine worked fine quilting the twin/crib quilt.  And it worked fine when I sewed the binding on it.  But a day later I can't get it to work for anything.  Maybe (hopefully!) it's telling me it wants to retire and it's time for me to get a new sewing machine. :)  If it is, I'm going to need to find one soon so I don't miss out on April's FMQ Challenge.

Happy Quilting!

Kathy

Tuesday, March 27, 2012

The T-shirt Quilt Adventure!

In October our pastor asked our small quilting group if we would consider making a T-shirt quilt for his daughter from t-shirts collected from various United Methodist youth gatherings.  The group agreed and we were given 13 t-shirts with 36 images!  None of us, as far as I know, had made a t-shirt quilt before.  The shirts sat, gathering dust, for a month before I finally bit the bullet and volunteered to take on the project.  If nothing else, I figured it would be good practice - my daughter has been saving t-shirts for several years!

The good part!

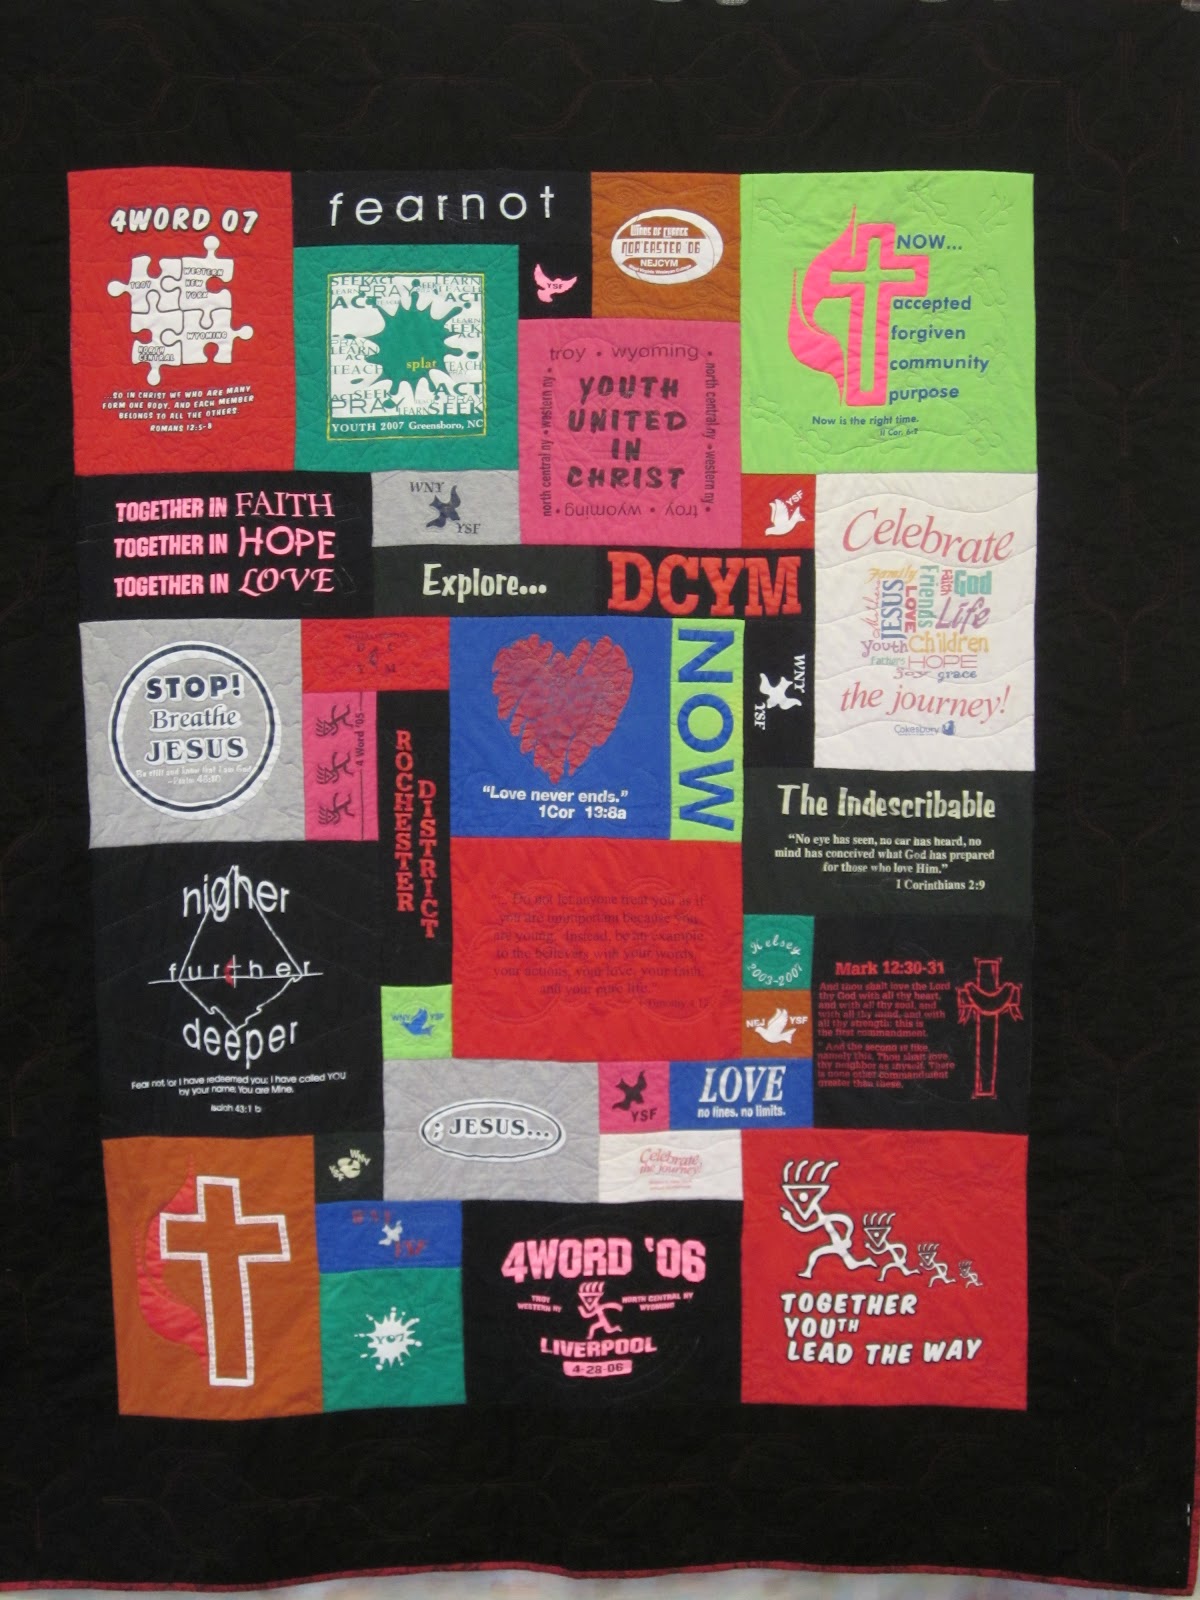
I'll get to the good part first... I finished it!  It turned out so much better than I expected.  Here's what it looks like.  I'll post close-ups too.

Kelsey's T-shirt Quilt


And now, for the rest of the story...

Since I hadn't made a t-shirt quilt before, I started searching the internet for instructions.  I knew people that had made them, and understood the basics of cutting them into squares and putting sashing around them so they'd all be the same size.  I had heard how I would have to stabilize them with iron-on interfacing before sewing them together.

But then I found Too Cool T-shirt Quilts.  They had a unique setting that really gave the quilt pizzaz!  And I didn't have to use the interfacing, which I've never liked even in my regular clothes sewing (I use the sew in kind).  I ordered their book and I was off on my adventure!

The first thing I did was make a sample quilt from my husbands old t-shirts and several different types of batting.  The batting was scraps from my friend, Millie's, longarm quilting business.  

Top to bottom - fluffy poly, flat poly, cotton blend, cotton.  Right side spray basted, left size pinned

I also tried June Tailor Quilt Basting Spray and pin basting.  And then I tried my hand at some free motion quilting, which I had never done before either!  Leah Day inspired me with her designs, her clear instructions, and her encouragement, all from her website!  It didn't turn out half bad.  I decided I could actually do this!

I also put this sample through the wash on laundry day.  I wanted to see if the basting spray washed out, and how much those battings would shrink.  Well, the glue stuff was still a bit sticky, and made the finished product more stiff than I liked.  And the cotton definitely shrunk up too much for what I had in mind, so I decided to go with a polyester batting and pin basting.

Kelsey
The first question I'm asked when I show the quilt is "You didn't use interfacing?  How'd you keep it from stretching?"  Well, I spray starched the bejeezus out of each shirt before I cut it!  And I moved my squares as little as possible before sewing.  Instead, in order to lay out the quilt, I took pictures of each shirt and imported them into Microsoft Publisher, where I re-sized the images to the exact size, cropped them, and moved them around.  I managed to use all 36 images (only had to trim one down) and had to add one blank block.  My friend Joan, embroidered Kelsey's name on it for me. 


puzzle pieces
Next up, batting.  I had it all picked out, I just had to find it at the store.  Remember, my sample was a cast off from Millie... and Millie had flown south for the winter...  Two quilt stores and three trips to Joann Fabrics later and I couldn't find it anywhere!  On one of the trips to Joann's, I purchased a batting, but when I got it home I decided it was too thin and not an even thickness. So back I went.  I finally settled on a wonderful 50% rayon (from bamboo), 50% cotton batting by Fairfield.  This stuff is soft and cuddly and drapes really nicely, and can be quilted up to 8" apart.  I must have been at the store for an hour and a half going "should I or shouldn't I..."  I did get sticker shock when I checked out.  Original price for a queen-sized batting was $57.00!!! Thank goodness for the half-off sale plus a 30% coupon on top of that. :-)


Michelangelo - Creation of Adam

I was still worried about the cotton shrinkage though.  So, I filled my bathtub with really hot water and let the batting soak for a half hour.  Unfortunately, when I drained the water I found that there was no way I could get the water all squeezed out of it.  It would take a year to dry!!  I took a chance and put it into my front-loading washer to spin out... Oh no!! My washer doesn't have a spin only cycle!!  It has a rinse and spin, but no spin only.  Praying (appropriate for this quilt!) I sent it through the rinse cycle on the comforter setting, and then sent it through the dryer.  Thankfully, it came out fine!


Methodist Cross and Flame symbol


My new found free motion quilting skills!   


Some of the squares lent themselves naturally to tracing the design.  


For the others, I looked for simple clip art of Christian symbols.


Once again, I took them to Publisher to enlarge them to the correct size, and I printed them on regular computer paper.  Then I “sewed” on the lines with no thread, to perforate the paper, and “pounced” baby powder through the holes to mark the pattern on the quilt.


"pouncing" the pattern
baby powder pattern


I found that the powder brushed off too quickly though, so I traced the powdery designs with a marking pencil or water soluble pen.  About halfway through quilting I started worrying that all the powder, chalk marks, and marking pencils and pens might not wash out completely.

pattern traced with a chalk pencil
one border all marked!


the finished flame


The border is actually the Methodist flame with a mirror image of it.  It looked really neat as a single flame chain, but that left too large of an area without quilting.  Some people thought that the pattern was a weird flower.  Others saw uplifting hands, and still others saw a dove coming down.


butterflies


For quilting I used Coats and Clarck 40 wt. tri-lobal polyester because I really wanted the sheen of the thread.  I tried several different types of sewing machine needles from embroidery ones to jeans needles to ball point needles specifically for knit fabrics.  The thread just kept shredding.


winds of change
 

I settled on the size 16 jeans needle because it seemed to work the best.I started with a variegated rainbow color but decided it really didn't look as good as I thought it would, so I switched to gray on top and red on the bottom (to match the backing). 


Add caption


 I used the "people" on this block as a pattern to fill in the large, unprinted area.  My daughter thinks this little guy is "creepy."


 And that brings me to the end of my saga with the t-shirt quilt.  I love the way it turned out. The quilting isn't as good as I would like, mostly due to thread problems, but it's great for my first try!

Hope you enjoyed my adventure!

~ Kathy


Even more pictures!


lamb

 
freehand squiggly lines

Sonshine!

pitcher, basin and cloth

bread and cup


I know I already have a shot of this square, but I liked how this picture turned out.


Wednesday, February 29, 2012

February's Feathers

I didn't get much of a chance to practice my feathers on the machine this month.  I've been working on quilting a double-sized T-shirt quilt.  Something I never would have tried a year ago.  But I did get a chance to play a bit, and did lots of them on paper!

feathers on placemats!

These placemats are for my church's annual fundraising bazaar.  I decided to take a chance and do the feathers on them.   While they're not as good as I'd like them, the placemats passed the inspection of the "Bazaar Ladies."  I swear, I get to a certain point and everything is looking pretty good and then I twitch or sneeze or something, and my lines go kaplooey!

I"ll post more pictures when I get a chance, but wanted to get these in for February!

Thursday, February 2, 2012

Feathers and Living Rocks

It's February, and the new tutorial is up at the Free Motion Quilting Challenge!  ((insert drum roll here)) And it's Feathers, with Diane Gaudynski.  Feathers?!  Feathers?!!  Are you nuts?!  It's only my second month doing free motion quilting and you want me to do Feathers?!?!  deep breath... Deep Breath... DEEP BREATH... I can do this... I CAN DO THIS!! It's okay now, the panic has passed, I'm fine, perfectly normal, in fact.

Like many of the other folks on the FMQ Challenge Facebook page, I wasn't expecting feathers until we had a bit more experience under our belts.  But after reading Diane's detailed instructions, I pulled out my trusty notebook and started drawing.  My feathers weren't terribly horrible.  Certainly not quality feathers, but they were recognizable!

Off to my sewing machine.  Drat!  I was having major tension issues last time, and gave up in utter frustration.  My old, crappy thread seems to work pretty well.  But when I tried the Coats and Clark 40 wt. trilobal polyester, things went kaplooey.  I changed needles, I changed tension, I changed bobbins, I changed my clothes (it was over the course of a couple of days, after all!).  The thread is very slippery and I remembered that when I used slippery thread in my serger, I had some netting sleeves to go over the cones.  I tried one of those out (the cheap version is part of a leg of panty hose or knee-highs) and I finally got it to work okay, but I still wasn't completely satisfied and I didn't want to waste all my good thread on practice pieces.  So, I went back to my crappy thread - a wooden spool of 100 year old thread on top, and a cheap cone of polyester serger thread on the bottom.  No, really, I'm serious... see?

Add caption

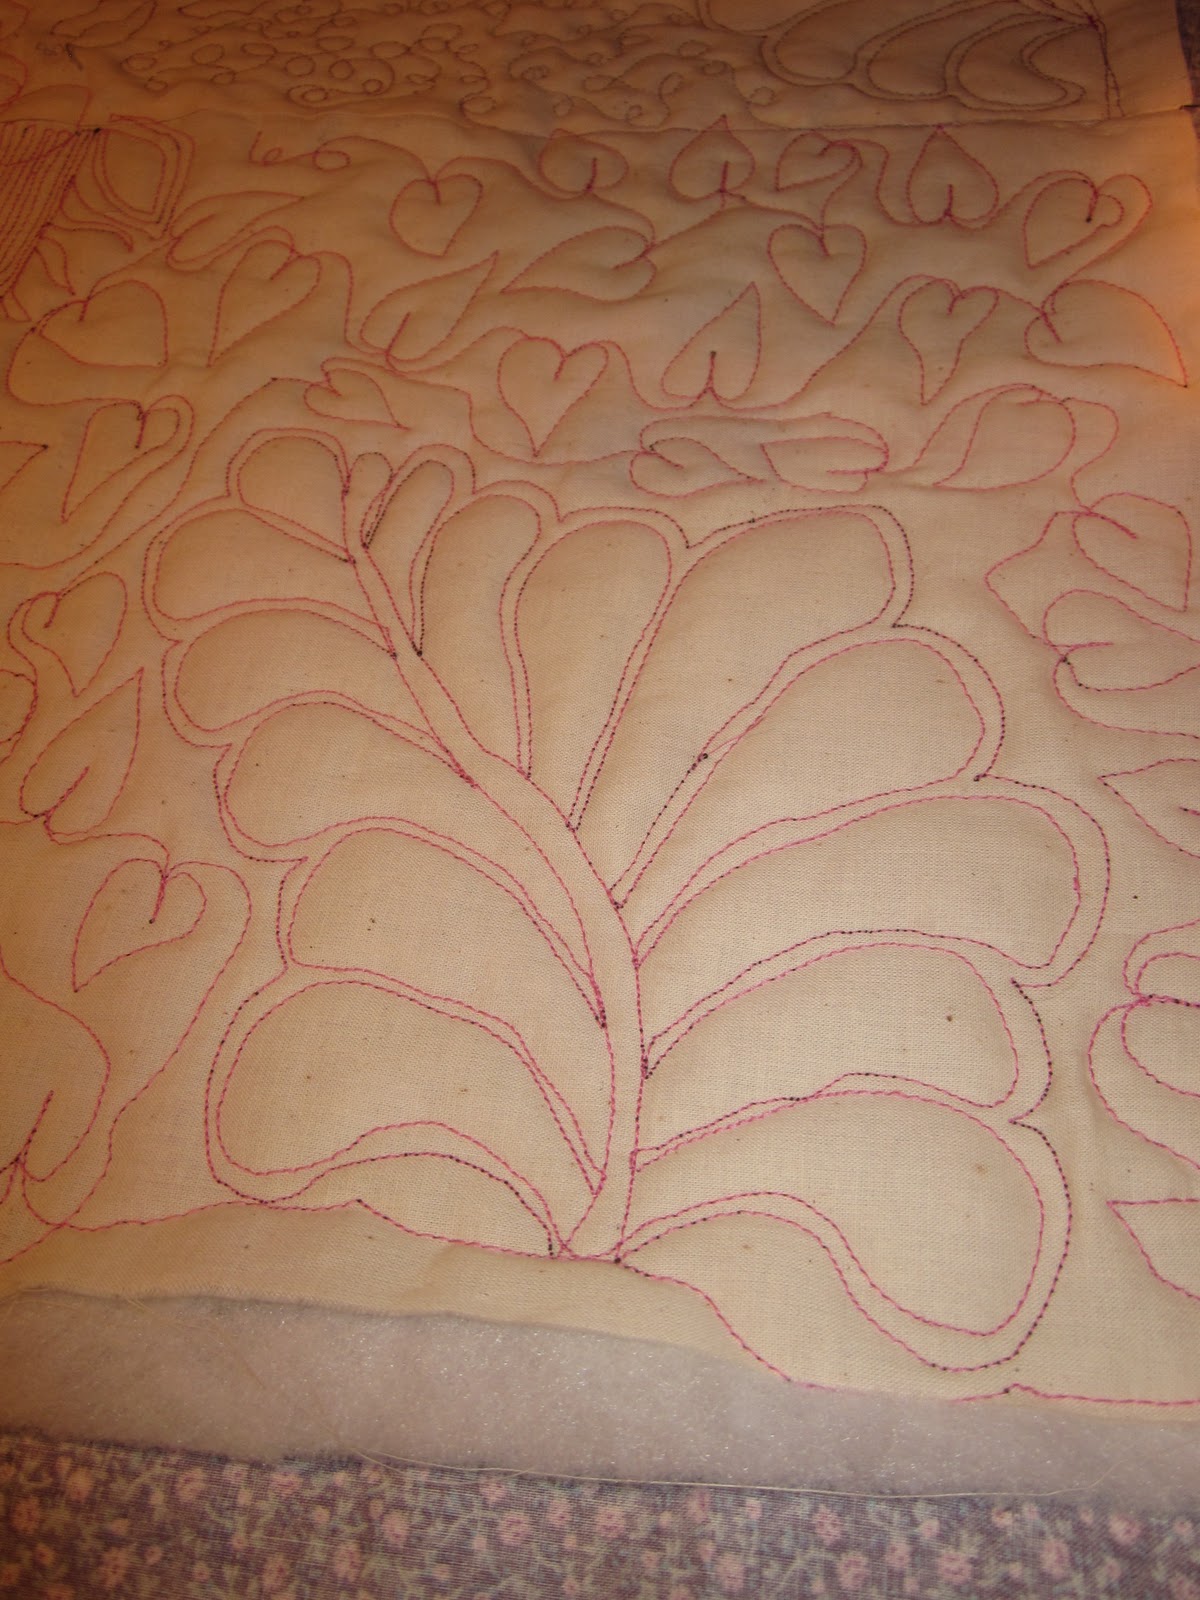
I got the tension pretty even and practiced a few leaves (still need more practice on those!), and attempted a few feathers.  I had to laugh - the tips of some of my feathers were almost square!  They remind me of a plant called "living rocks."  

My First Feather
 
Living Rocks (Lithops)


I quilted a couple more feathers and decided I really needed to practice my echoing, and getting my spaces down closer to 1/8".  

Second Feather
Third Feather

I was sewing merrily along, ran out of bobbin thread, popped a full one in and continued on.  But I noticed my top thread was looking really good, no little "pricks" of the bobbin thread showing through.  Uh oh, better check out the back... ARGH!!!

All those pink loops are my top thread!!  

Now, I knew the bobbin that I had just put in was good.  It was working perfectly fine earlier in the evening!  I re-threaded everything - two or three times, checked for lint around the bobbin (didn't see any, but I brushed it out anyways), and ran a piece of heavyweight hand quilting thread, doused with a bit of silicone spray through the groove part of the bobbin case.  Put everything back together and managed to finish filling up my practice piece.

It was definitely an adventure.  I am really quite pleased with how my first feathers turned out.  I do feel a bit like a kindergartner.  With a good bit of practice, I can see me making some beautiful feathers.  Thank you SewCalGal for challenging us! Other than my tension problems (bring the shoulders down, breathe deep, relax) and my sewing machine's tension problems, I had fun tonight!

Monday, January 30, 2012

It All Started...

It all started with Leah Day’s Free Motion Quilting Project... Well, no, it all started with friends of mine asking if I would make a T-shirt quilt for their daughter... wait, it all started with full page doodle I did... Okay, it really started more than 40 years ago when my mother taught me to sew.

Maybe it’s easier to say where it all culminated!  Because of the reasons above, in addition to several others, I decided to finally sit down and learn how to quilt (as opposed to piecing) on my home sewing machine.  While searching online for helpful hints on how to get started quilting the T-shirt quilt, I stumbled across Leah Day’s website and her Free Motion Quilting Project (365+ designs for free motion quilting!).  Not only does she have tons of neat designs, but she’s also done short videos of each.  I don’t know about you all, but I’m a very visual, hands-on learner.  Those videos are just the tool I needed to get me started.

I can’t tell you how excited I was.  I had shown my full-page doodle to a couple of friends, including a non-quilter.  One of the first things he said was “You should make a quilt out of that.”  I laughed and said, that it would be a cool quilt, but if I had to hand quilt it, it would never get done.  And I had no idea how to quilt it by machine. Leah’s designs were so similar to my full-page doodle that I could finally see how I could do it!

The second best thing to come from Leah’s website was her showing that the free-motion quilting foot didn’t need to hop up and down.  The hopping foot always bothered me. Her explicit instructions on how to modify it were great!  Thanks to Leah showing how easy it was to slide the quilt sandwich under a properly placed, non-hopping foot I knew I was on my way!

And that leads me to SewCalGal’s 2012 Free Motion Quilting Challenge - another website that I stumbled upon, where quilters from around the world have been challenged to improve their free motion quilting. This isn’t a challege to be the best, just to do your best, practice and improve.  With Leah’s instructions and SewCalGal’s monthly challenge, I finally sat down to try my hand at FMQ.  


The January challenge, by Frances Moore, is some simple (?!) meandering leaves.  I dug out an old notebook and started doodling the leaves - putting them into my “muscle memory.”  


 Then I dug out some scraps of fabric and batting (courtesy of Millie, a friend that does longarm machine quilting and donates the scraps to our sewing group at church) and started playing with thread, needles, tension, batting... and came up with this for my first try.  Not too bad, but definitely need more practice! 


I did my first practice sandwich three weeks ago and then got distracted by a baby quilt.  Now it's the end of the month and I'm figuring out how to make this blog look the way I want it to (a work in progress!) and get at least one picture posted for the challenge.