Feathers and Living Rocks
It's February, and the new tutorial is up at the Free Motion Quilting Challenge! ((insert drum roll here)) And it's Feathers, with Diane Gaudynski. Feathers?! Feathers?!! Are you nuts?! It's only my second month doing free motion quilting and you want me to do Feathers?!?! deep breath... Deep Breath... DEEP BREATH... I can do this... I CAN DO THIS!! It's okay now, the panic has passed, I'm fine, perfectly normal, in fact.
Like many of the other folks on the FMQ Challenge Facebook page, I wasn't expecting feathers until we had a bit more experience under our belts. But after reading Diane's detailed instructions, I pulled out my trusty notebook and started drawing. My feathers weren't terribly horrible. Certainly not quality feathers, but they were recognizable!
Off to my sewing machine. Drat! I was having major tension issues last time, and gave up in utter frustration. My old, crappy thread seems to work pretty well. But when I tried the Coats and Clark 40 wt. trilobal polyester, things went kaplooey. I changed needles, I changed tension, I changed bobbins, I changed my clothes (it was over the course of a couple of days, after all!). The thread is very slippery and I remembered that when I used slippery thread in my serger, I had some netting sleeves to go over the cones. I tried one of those out (the cheap version is part of a leg of panty hose or knee-highs) and I finally got it to work okay, but I still wasn't completely satisfied and I didn't want to waste all my good thread on practice pieces. So, I went back to my crappy thread - a wooden spool of 100 year old thread on top, and a cheap cone of polyester serger thread on the bottom. No, really, I'm serious... see?
 |
| Add caption |
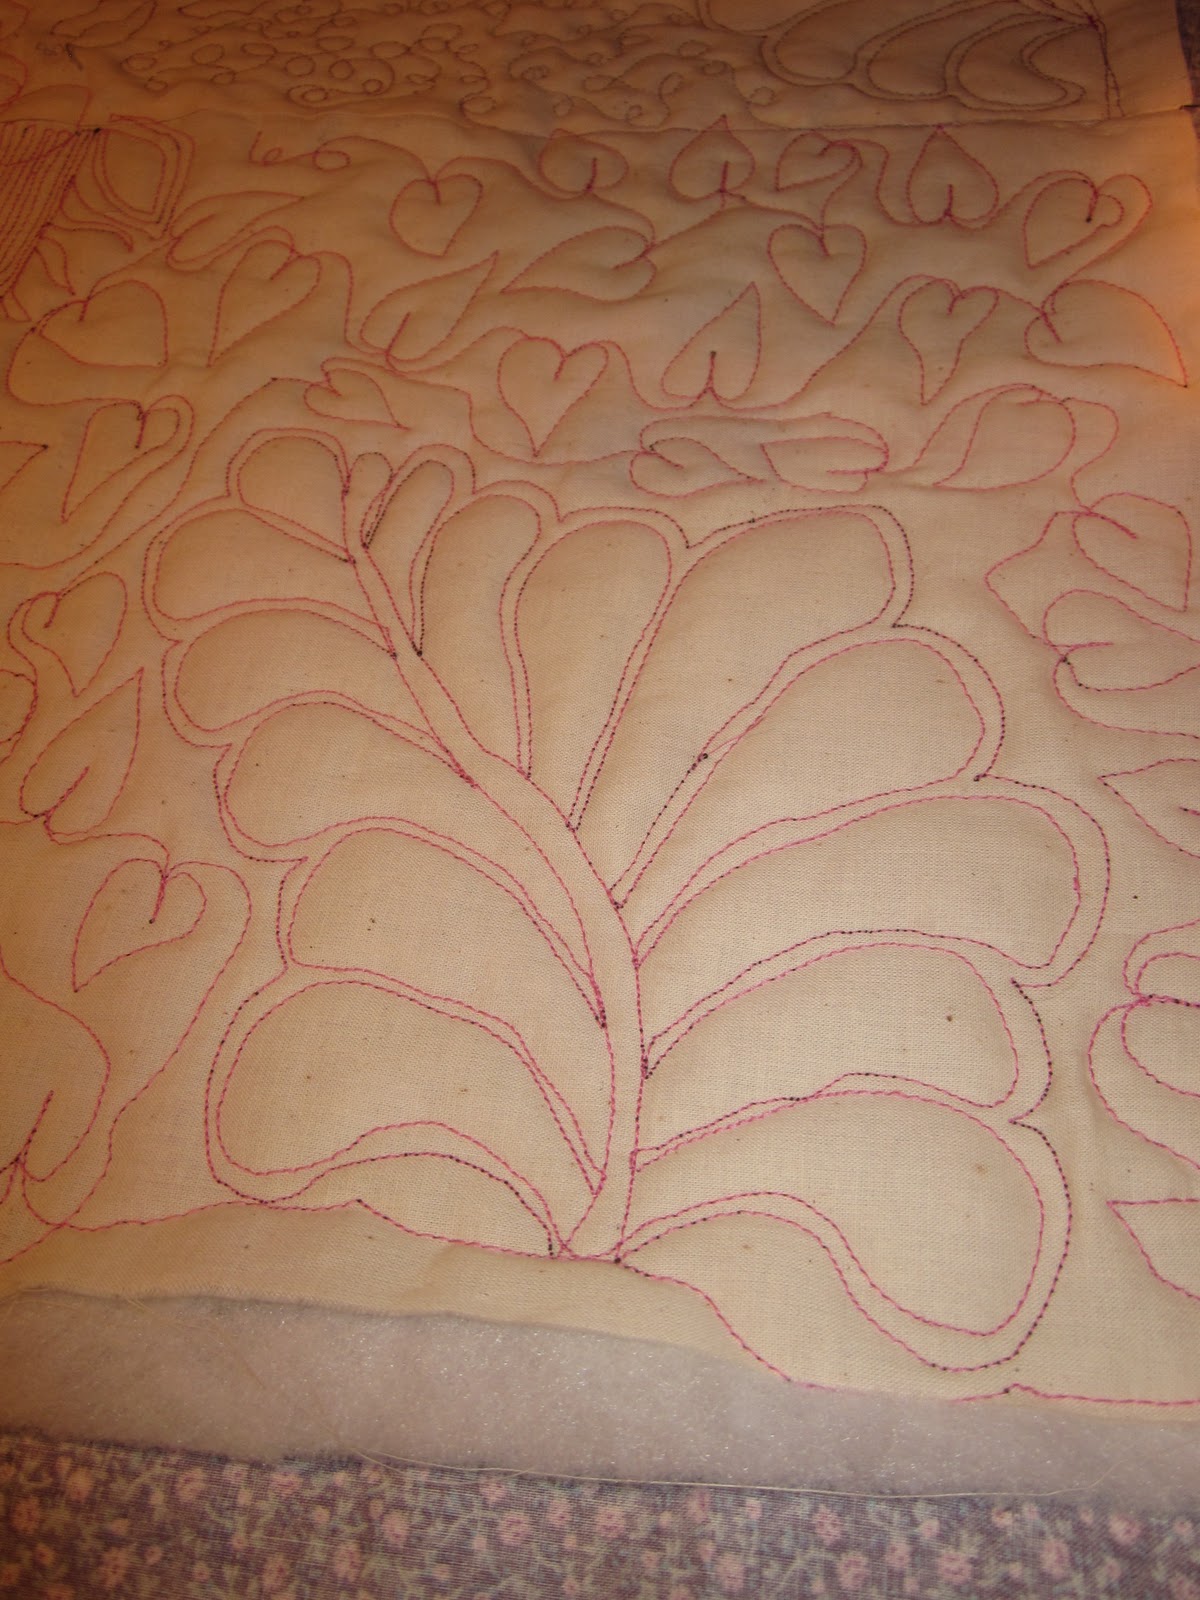 |
| My First Feather |
 |
| Living Rocks (Lithops) |
I quilted a couple more feathers and decided I really needed to practice my echoing, and getting my spaces down closer to 1/8".
 |
| Second Feather |
 |
| Third Feather |
I was sewing merrily along, ran out of bobbin thread, popped a full one in and continued on. But I noticed my top thread was looking really good, no little "pricks" of the bobbin thread showing through. Uh oh, better check out the back... ARGH!!!
 | ||
| All those pink loops are my top thread!! |
Now, I knew the bobbin that I had just put in was good. It was working perfectly fine earlier in the evening! I re-threaded everything - two or three times, checked for lint around the bobbin (didn't see any, but I brushed it out anyways), and ran a piece of heavyweight hand quilting thread, doused with a bit of silicone spray through the groove part of the bobbin case. Put everything back together and managed to finish filling up my practice piece.
It was definitely an adventure. I am really quite pleased with how my first feathers turned out. I do feel a bit like a kindergartner. With a good bit of practice, I can see me making some beautiful feathers. Thank you SewCalGal for challenging us! Other than my tension problems (bring the shoulders down, breathe deep, relax) and my sewing machine's tension problems, I had fun tonight!
Hello Kathy,
ReplyDeleteFirst off, your leaves and feathers are looking good. I'm glad you had fun regardless of the tension troubles. Looping on the bottom with the top side stitches looking good usually means that the top tension is to loose or the machine is not threaded correctly. Try flipping the bobbin the thread should feed off the bobbin counter clockwise. Also, quite a few sewing machines are picky about thread. Generally, it is easier to get the tensions set evenly when using the same thread type in the needle and the bobbin. If the tension is good when straight stitching it should be "ok" when free motion quilting. Some say leaving the feed dogs up and covering them fixes tension issues. There is also a little teflon washer (genie?) to put inside the bobbin casing to help the bobbin thread flow more smoothly. Hope this helps! Happy FMQ
Hi Tammy!
ReplyDeleteThank you for the helpful tips. I had actually tried all of those things. I finally went back to square one and did some "regular" sewing and came to the conclusion that I must have had the bobbin in backwards. I have one machine that likes it clockwise and one counter-clockwise. It really did help to just step away for the evening and come back the next day with a clear mind for a fresh start.
Thank you for the compliments on my leaves and feathers too. I'm still practicing them, though I'm a bit sidetracked by a T-shirt quilt that I am now free-motion quilting.
Thank you for stopping in!
Your feathers are looking great. I'd seen living rocks before, but didn't realize they came in different colors.
ReplyDelete